
The pattern for this kit, in 1:2500 scale for ‘The Delta Quadrant’, is one of the most complicated I have done is recent years! There were very few straight edges in the design and every surface had compound shapes & forms and tons of hull plating. The design was symmetrical from left to right, so that helped out a bit. Although there are fan made blue prints of the ship, there is nothing available that was used by the FX model shop. That meant that the drawings could only be used as a rough guide. Thankfully I had access to a filming model via unlimited photographs. They were provided by the owner of one of the FX models, Mr. George Takacs.
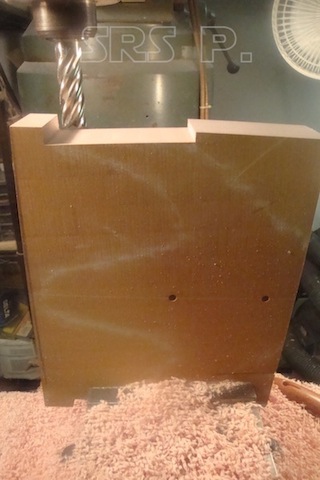
This was going to be a monster of a pattern, so planning was essential. The hull design was low in profile, so I was going to be able to machine the majority of it out if one solid block. The first step is to square up the main block and place the mounting hole for my work block. The work block enables me to go from the mill to the bench and back again and replace it in the exact same position for machining accuracy. Once I have the block squared up and holes drilled for the work block, I can trace the hull profiles onto it and start cutting material.

Starting block
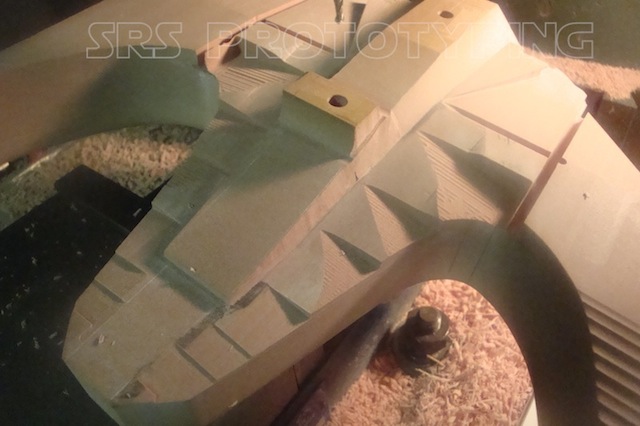
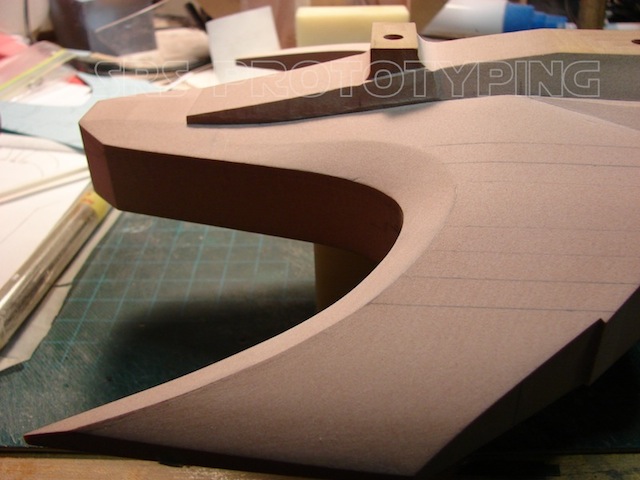
Once I have the top profile completed, (view looking down on the ship), I start the side profile. I also have to co-ordinate the shaping I do with the front and rear views to make sure I do not remove material that I will have to replace later. You can see the card stock pattern guide glued the the side of the block to guide my machining. It is a matter of carefully machined steps in the block that will be ground down, sanded and blended smooth to achieve the proper shapes and curves. As I machine the surfaces, I also draw in with pencil the various land marks and details that need to fit on the surfaces and within the hull shape. That allows me to adjust anything as I progress, and cuts down on any miss-steps in establishing the over all shape.

Once I have one side done, I can mirror the same milling steps on the opposite side.
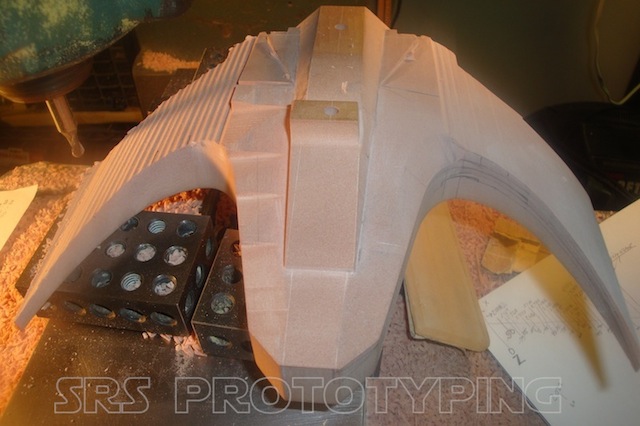
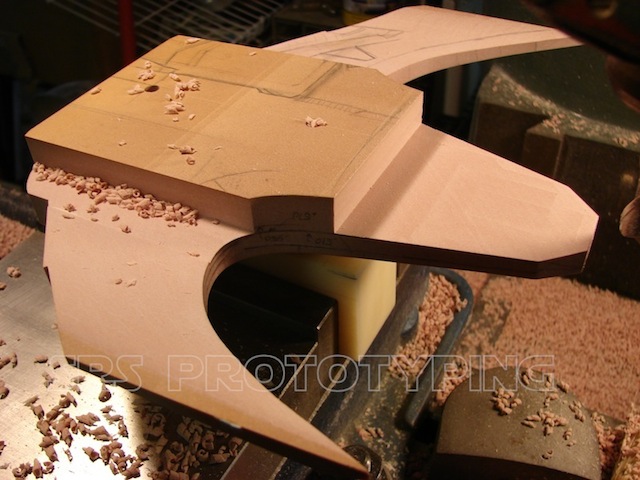
Notice all of those compound angles and shapes have all been blended together and meet in nice sharp edges! ( smooth as a baby’s bum!) I have left two falt areas around the mounting holes for the work block so I can filp between working on the top and bottom as needed.
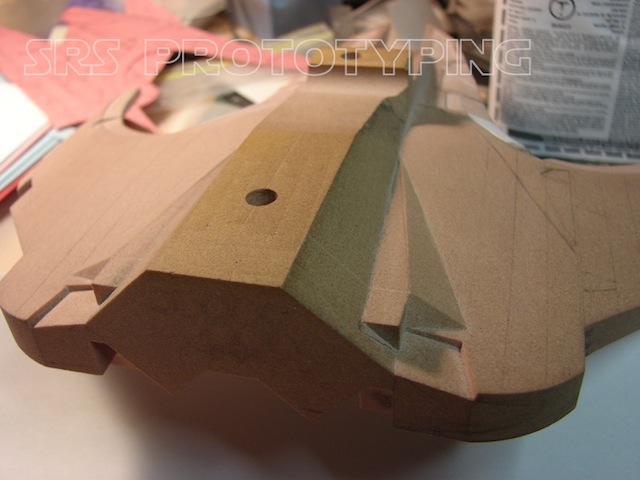
Once the top is where it needs to be, I can flip it over to start the bottom. This is where care needs to be taken. Once the pattern becomes thin, it can flex under the load of machining it down to thickness. I start from the outside an work towards the center line to avoid most of that problem.
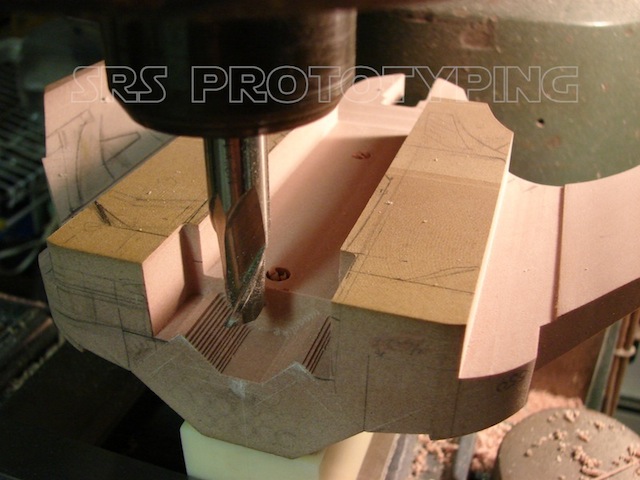
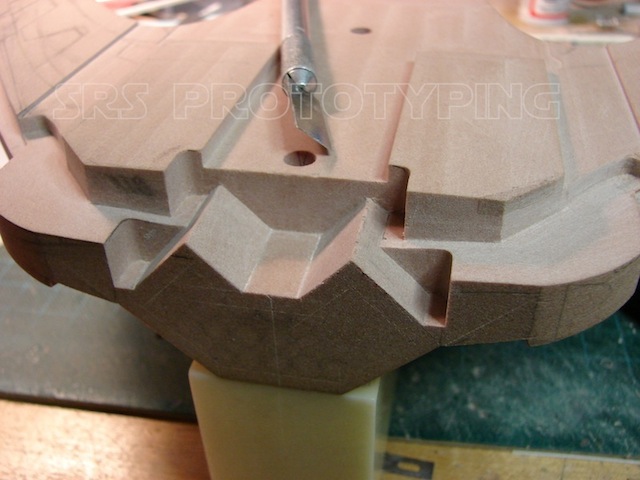
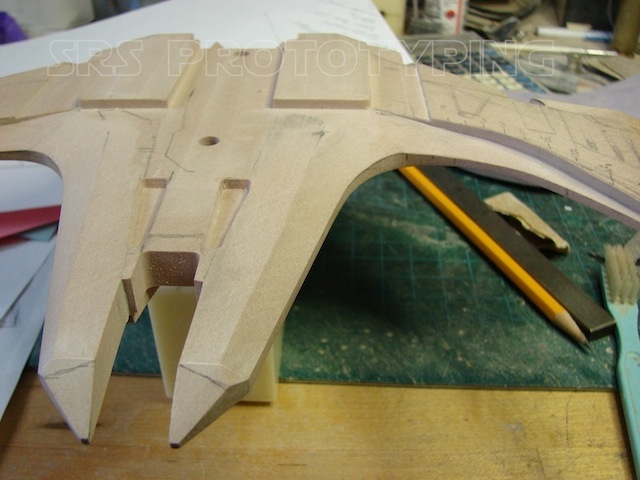
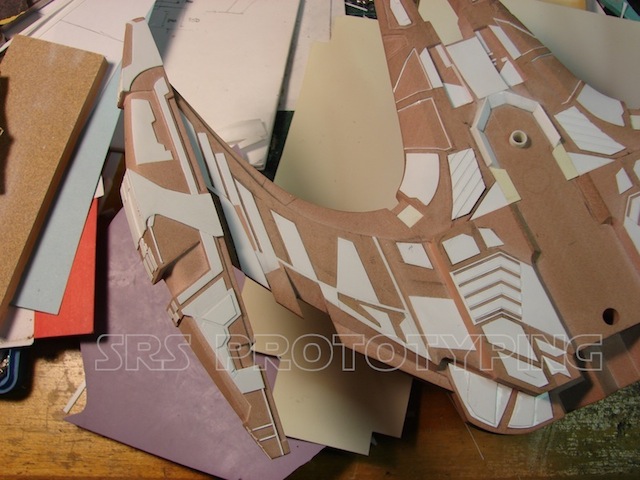
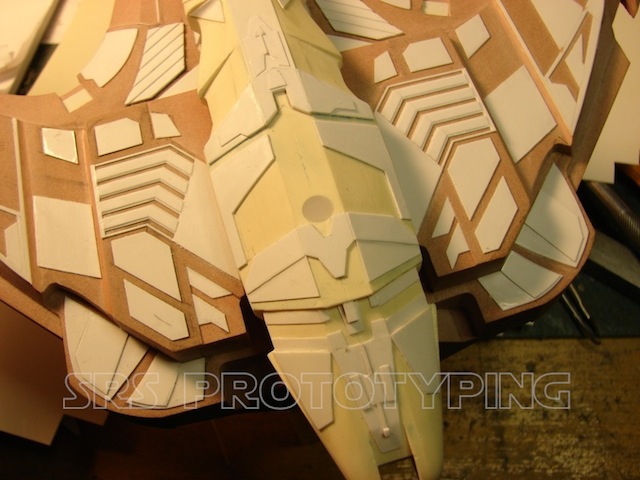
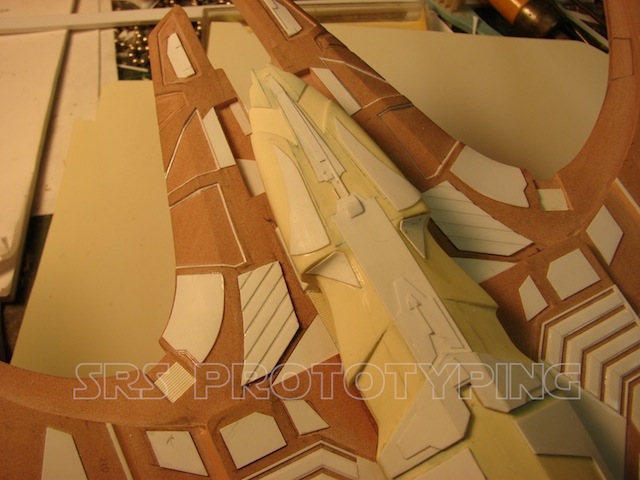
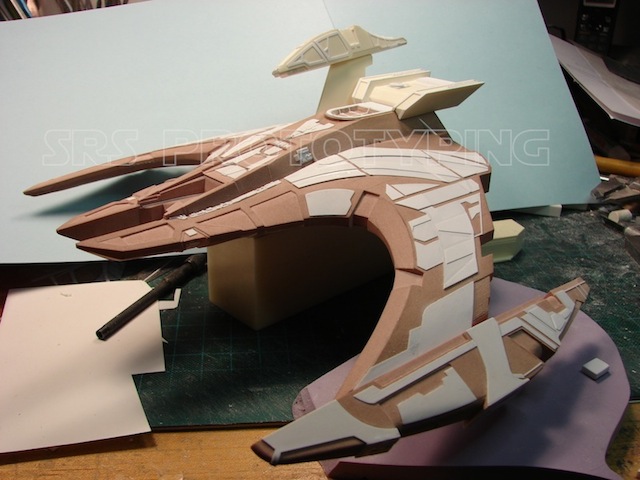
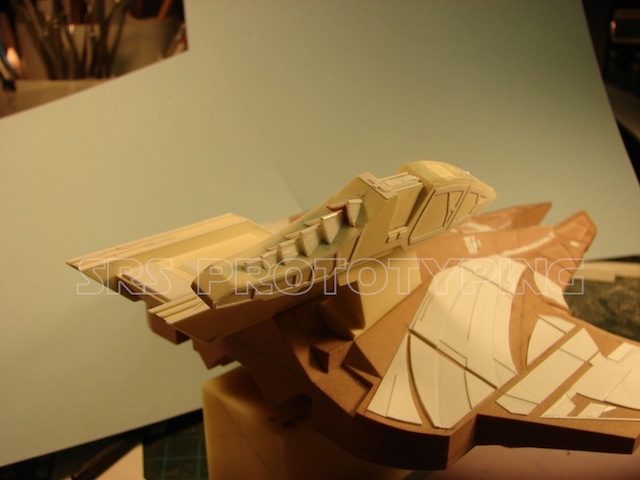
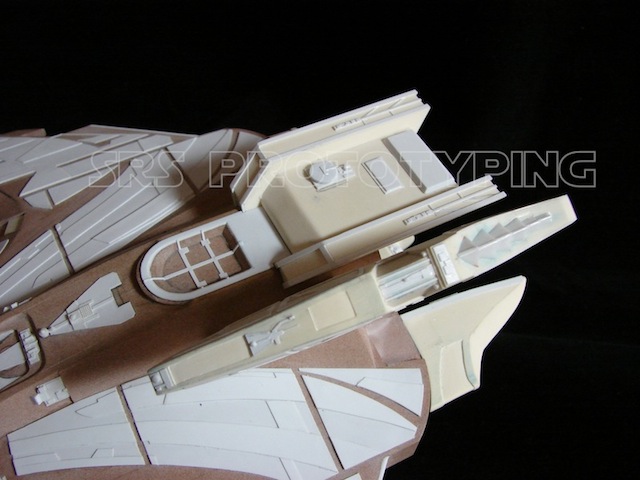
The most complicated part of the pattern was creating all of the bevels and steps in the leading and trailing edges of the wings. It is all hand work guided by the images of the filming model.
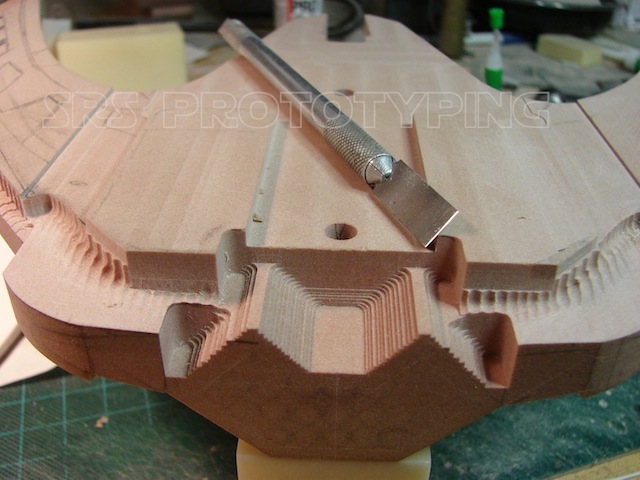
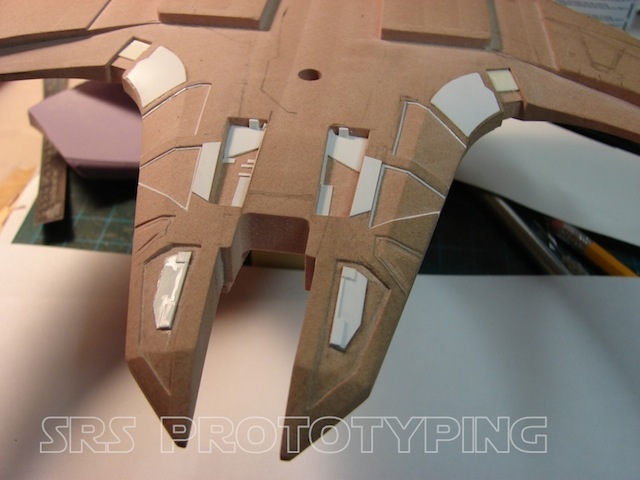
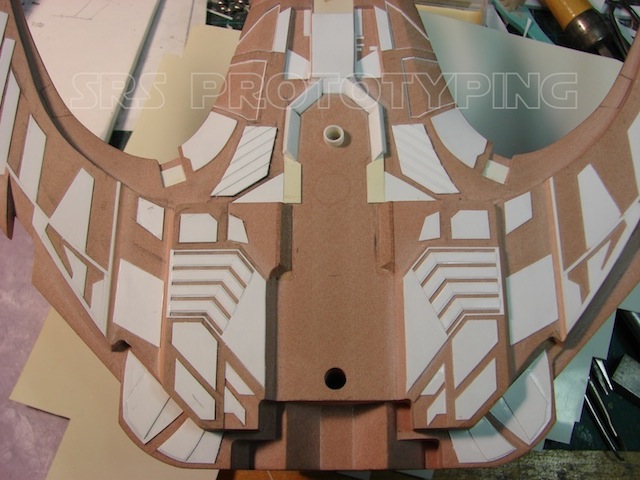
All of the surfaces are blended, pockets and cut outs in place, time for surface detailing. Hull plating, just a little bit of that…..
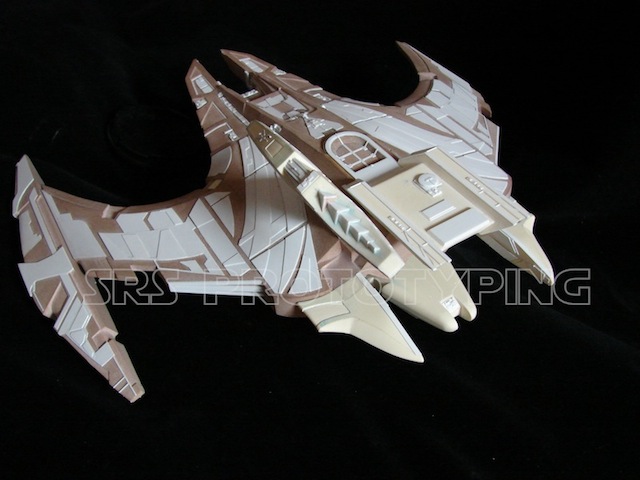
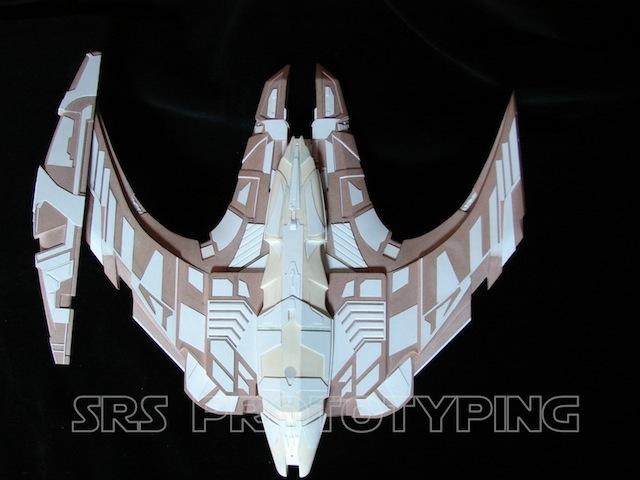
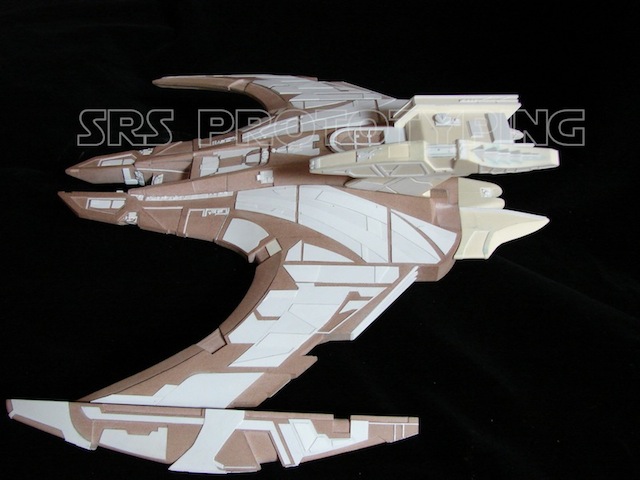
There is so much more that went into completing this master, but this over view gives you the an insight into the most challenging areas.
The completed master pattern and all of its components;
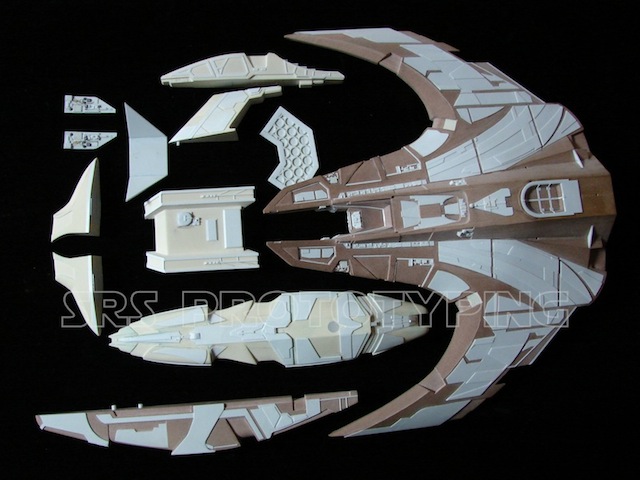
(The large pod that locates on the underside is a pattern unto itself.) This is the final test fitting and assembly.
Thanks for looking!