
This kit is available exclusively at Federation Models;
Before you begin:
-Check to make sure there are no missing or broken parts.
-The parts should be carefully cleaned with warm soapy water and a soft toothbrush.
-All parts should be test fitted before gluing.
-A Cyanoacrylate glue (super glue) should be used for attaching parts.
-Remove primer and paint to expose raw plastic to allow proper adhesion of glued parts.
-Read through the instructions before beginning.
Over all parts:
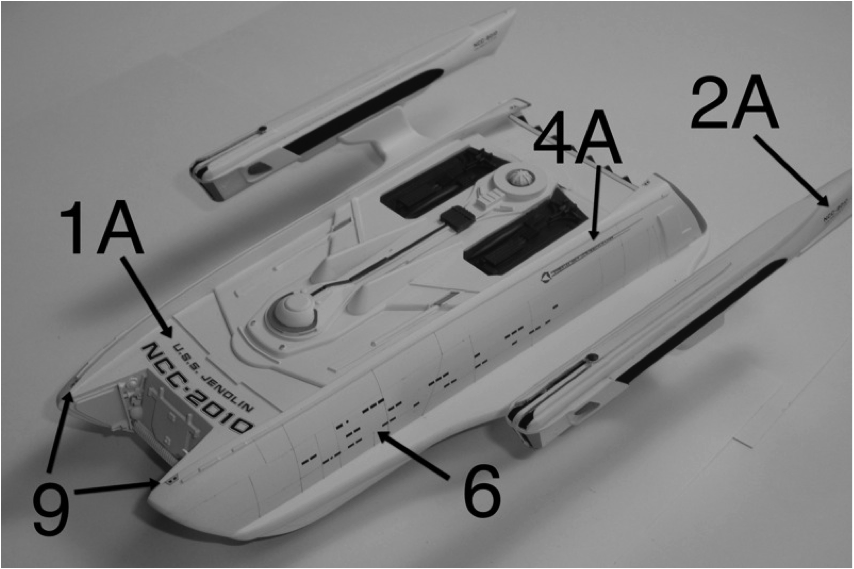
There should be 16 urethane parts, two paper pattern guides, three pieces of styrene and a decal sheet.
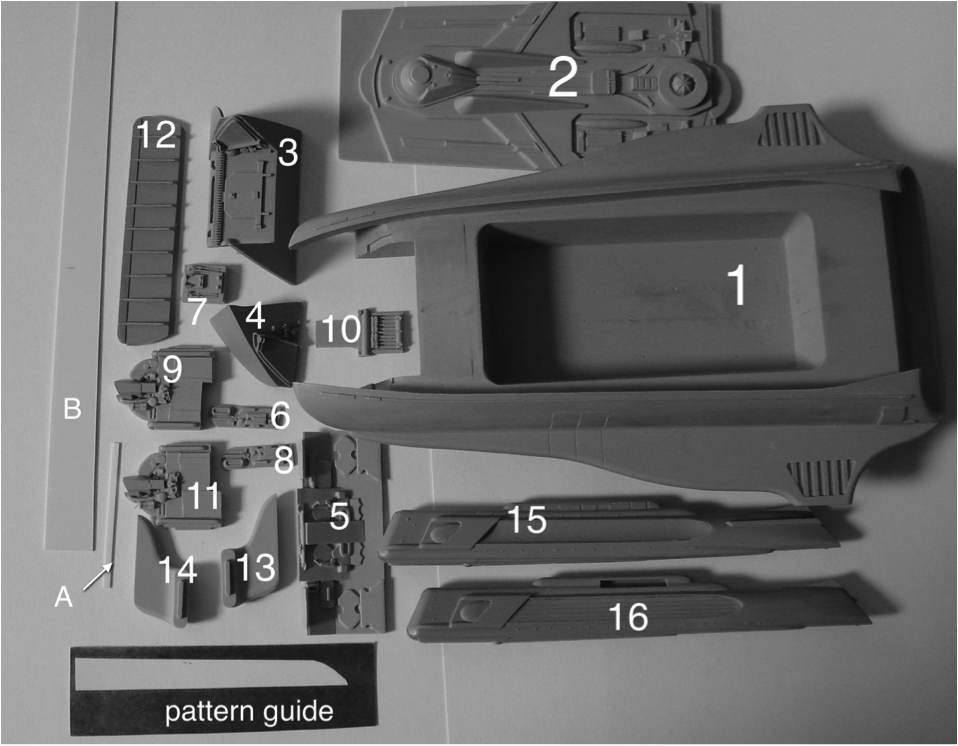
Sydney Class kit
Top plate and bow parts
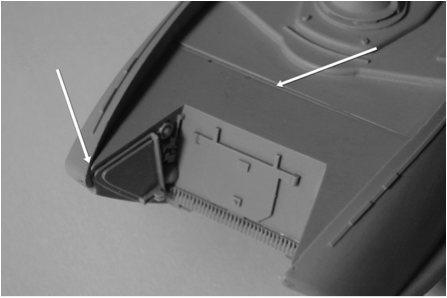
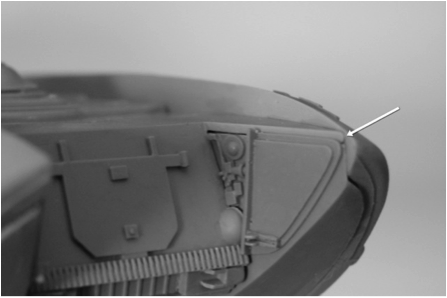
Carefully remove the existing ribs on the hull, ( arrows) to allow the bow part (3) to fit against the top plate (2). Then slide the top plate forward, starting from the stern of the hull. The front edge of the top plate should be flush with the vertical wall.
(It may be necessary to sand the sides and flat-sand the bottom of the top plate to achieve the proper fit. Use caution and go slowly when doing this.)
( below shows removed ribs )

Sydney Class kit
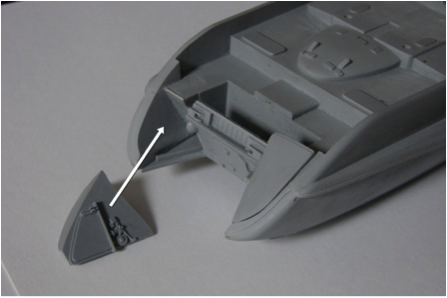
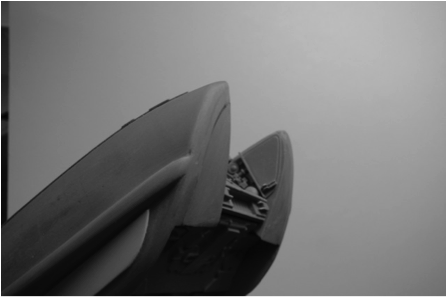
( below shows proper alignment of the bow piece)
Sydney Class kit
Once you have achieved the proper alignment, lightly tack parts 1, 2&3 in position.
You can now fit part 4 in position, as shown below.
Sydney Class kit
Sydney Class kit
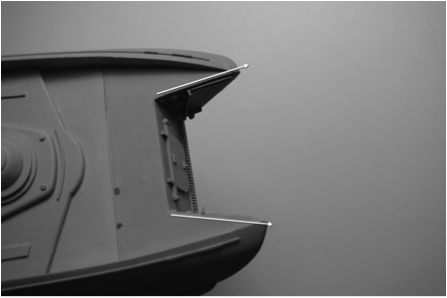
Below shows the front edge of part 4 should line up under the ‘point’ of part 3. (arrow)
Sydney Class kit
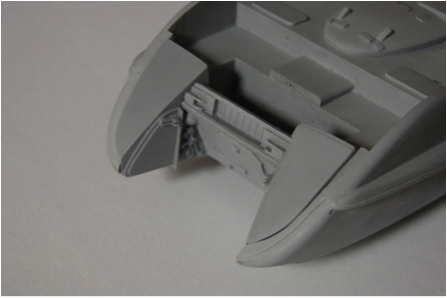
There will be some gaps between the hull and these parts due to shrinkage of the larger mass of the hull.

Sydney Class kit
Once you have the parts 3&4 properly aligned, you can permanently glue them in position. Careful sanding and blending will give you a nice blended look as shown. A bevel should be added to the bow by following the edges of part 3, (arrows) to remove the ‘points’ on the hull.
Sydney Class kit
Sydney Class kit
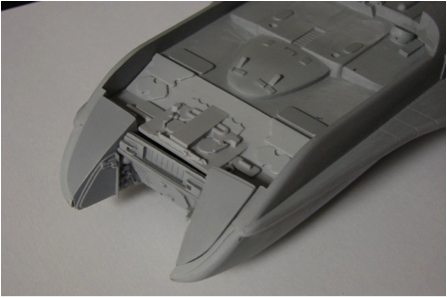
Once you have the bow parts glued in position, you can fit part 5 (the bottom plate) in position.

Sydney Class kit
Sydney Class kit
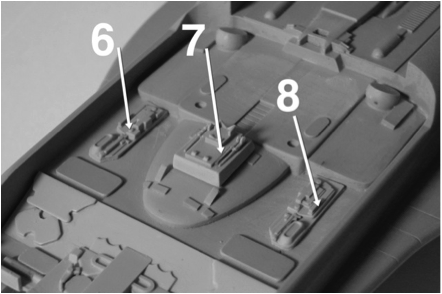
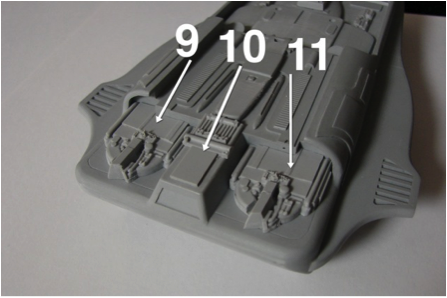
Parts 6,7 & 8 can now be put in their places. Grinding a ‘dish’ shape in the underside of part 7 will make it fit more properly. Parts 9,10 & 11 can be put in place next.
Sydney Class kit
Sydney Class kit
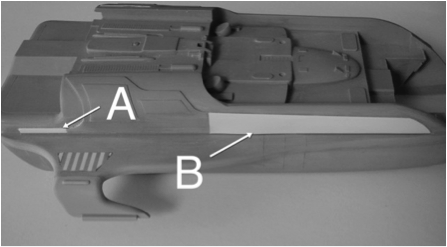
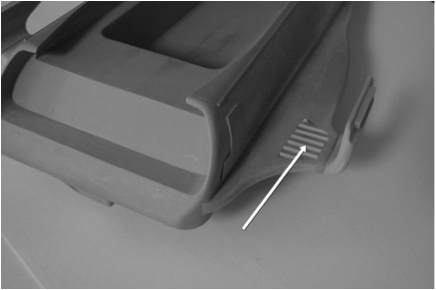
The strips of styrene are for the side details on the underside of the hull. Using the provided pattern cut out two shapes to be applied to the left and right side of the hull, (B). The thin styrene strip should be cut into two lengths of .800”, (A). Position as shown.

Sydney Class kit
Sydney Class kit
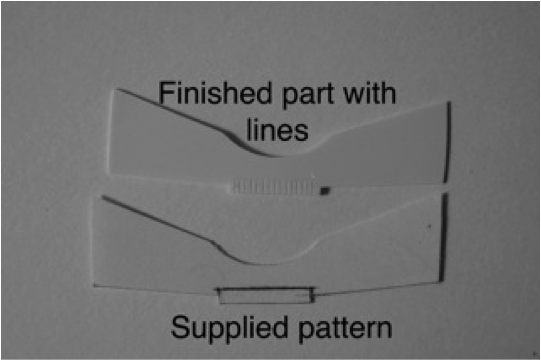
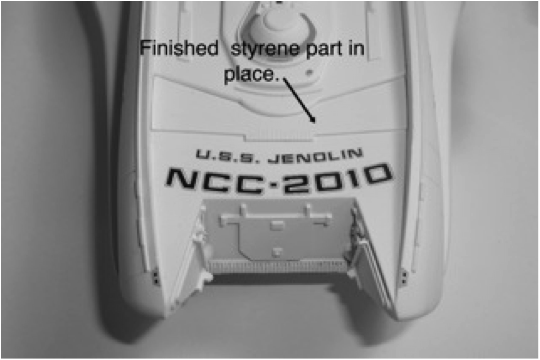
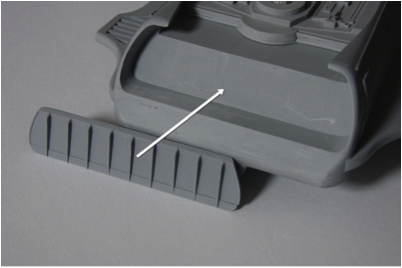
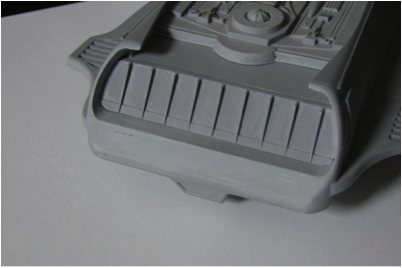
The rectangular piece of styrene is for the top bow area. Use the pattern provided to cut out the styrene. Carefully trim to fit into place. Add the engraved lines as shown.
Sydney Class kit
Sydney Class kit
Part 12 can be fitted now. It may be necessary to flat sand the back to remove some thickness. Be careful not to damage the fine edging detail.
*I advise that you dry fit part 12, but not glue it in place. The entire part is flat black and could be added after the rest model has been painted*
Sydney Class kit
Sydney Class kit
The main engine pylons can be attached next, parts 13 & 14. Before attaching them, the grills in the top and bottom of the airfoils, (arrow) should be filled and smoothed.
Sydney Class kit
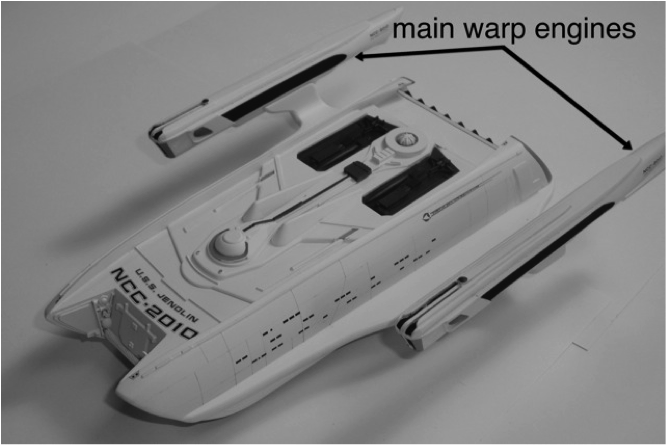
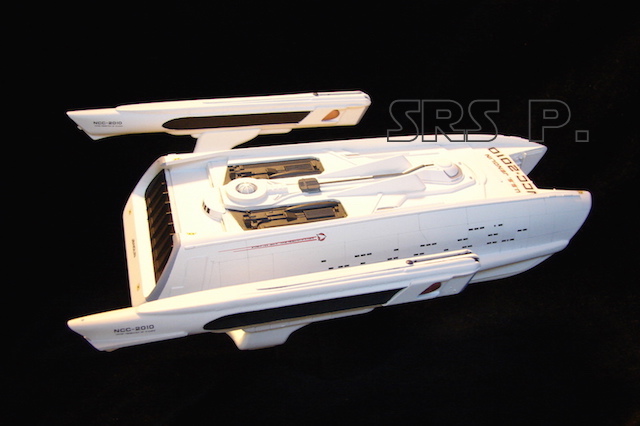
The main warp engines are positioned as pictured below.
Sydney Class kit
Painting and decals
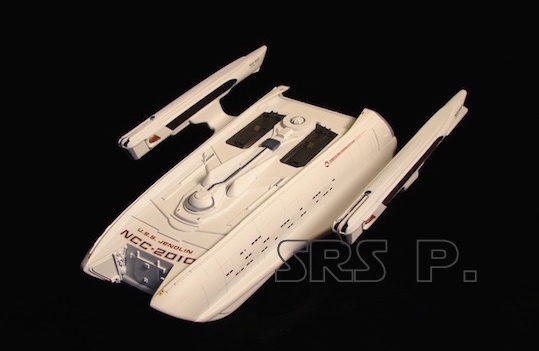
There are markings supplied with your kit for either the Jenolin or the Nash.
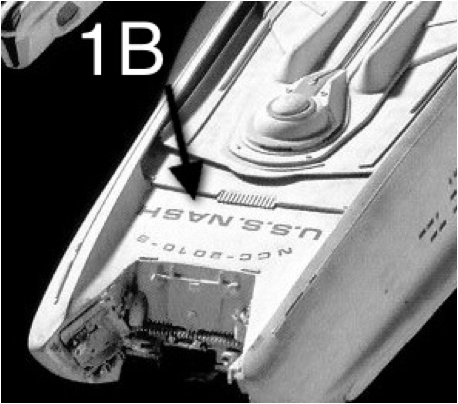
The decals for the bow marking on the USS Nash should be positioned as shown below. The inverted positions of these markings are the only real difference between the two ships.
Sydney Class kit
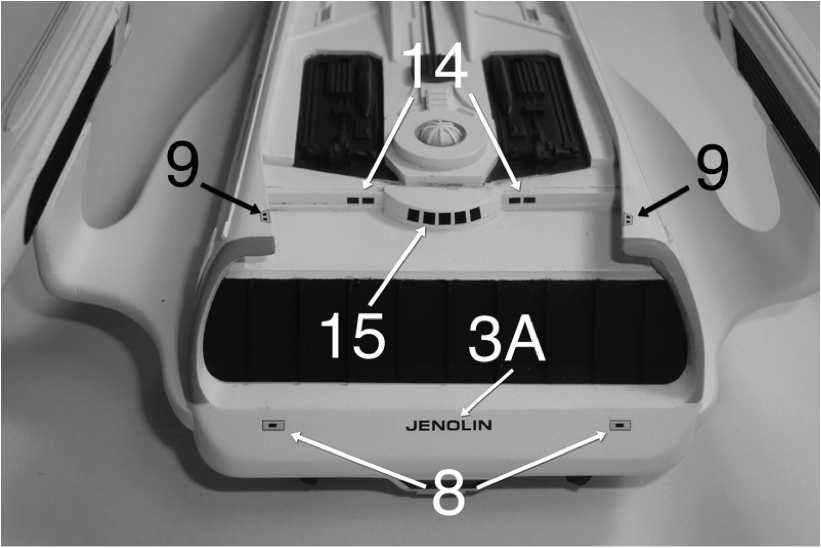
All of the other decals are identical in placement for both versions.
Sydney Class kit
Sydney Class kit
These are some images of how I painted and weathered the kit. The panel lines are drawn in using a pencil.
Sydney Class kit
Sydney Class kit